 |
| Tips & Tricks | |
|
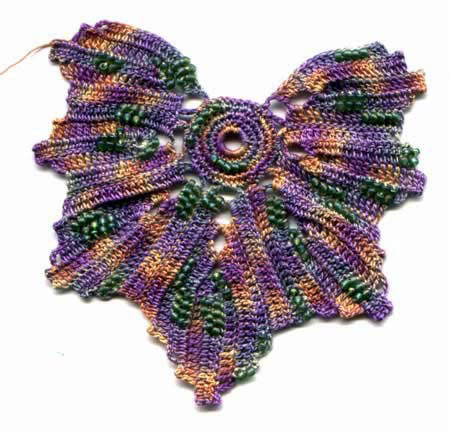
Bead Crochet with Variegated Thread
Bead Spinner Tips Blocking Color wheel Crochet Tension Getting Started with Thread I went down to my local craft store and bought some thread and a lovely pattern I thought would be fun to try, then I went over to look at the hooks. AHHHHHH, but after I calmed down, I found one that I thought looked like the right size for the thread I was going to be using. It was a size 3 Susan Bates. I didn't know, at the time, that it was not the correct hook to use for size 10 crochet thread but you know, it worked and I made tons of lovely things so who cares. After I had been crocheting with it for awhile I became very confident and decided to try the hook that was suggested in the patterns for size 10 thread. I was surprised at the difference in size but it didn't matter. I was used to working with the smaller hook and thread. I strongly recommend this method. It really helps take the fear out of thread crochet especially if you learned to crochet using yarn and are now trying to make the transition. I suggest you buy a Susan Bates size 1, 2, or 3 hook and either size 5 or size 10 DMC Cebilia, or Coats & Clark Opera crochet thread also in the size 5 or 10. The size 5 is a larger thread and would be easiest to work with. You can find it at your local yarn store or have them order some in for you. I highly recommend these nicer threads. As a lot of crocheters do I used to buy the less expensive threads when I started out because that's what I felt I could afford but after I had been crocheting for several years I decided to try some of the DMC threads and I was hooked. I couldn't believe how much easier crocheting became for me. The nicer threads have a soft sheen and a tighter twist to them which allows the thread to glide more smoothly off your hook, in and out of your stitches more easily, and it doesn't split as easily when crocheting. Here's is a test I do for all my students. Take one end of the cheaper thread in each hand and pull it apart. Now take one end of the nicer thread in each hand and pull it apart. The difference is obvious. About 12 years ago I crocheted some BEAUTIFUL table cloths out of the cheaper threads. Over time the threads began to deteriorate and are now breaking in places. That doesn't happen with the nicer threads. If you are making more craft type items for decoration only, it won't make as much difference but if you are putting many hours of your time into a beautiful table cloth, bedspread, or even a doilie, and want this treasure to last, use the nicer threads. You will appreciate their staying power and look after many years of washing and use. Recommended Supplies:
I always recommend that people start with a Leisure Arts doilie pattern. They are my favorite. Their directions are clearly written and user friendly. I also recommend you start with a round doilie pattern. When you are just getting started I have found it easier to crochet in the Round (Rnd) than to crochet in Rows. If you need one on one instruction, but don't have anyone in your area you can ask for help, I suggest you buy a crochet video tape. There are a few out there on the market that are quite helpful. Here is a link: http://www.victorianvid.com/ Good Luck! How To Do Research On The Internet Left Handed Crocheters Sewing in Your Ends
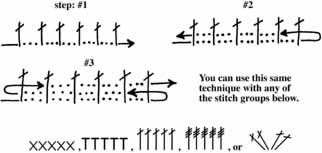
You need to catch a thread on each end so when you pull the thread back through again you are not undoing what you just did. When doing a 3 weave stitch you are creating a locked stitch which will not allow your project to unravel at a later time. Sometimes you can get away with a 1 weave stitch, or a 2 weave stitch but most of the time I like to do a 3 weave. I like to use a Tapestry Needle when doing the 3 weave stitch. Never finish your projects by cutting the thread too close to your beginning or ending slip stitch. if you do, your project will most likely come apart over time with cleaning and use and could be very difficult or impossible to repair.What is an Amulet Bag? If you have a family member or friend who is going through a tough time you can put prayers in it for them. Every time you look at or touch the bag you will be reminded to send them love and prayers. Love is very powerful for healing the mind, body, or spirit. Also, if you have small gifts that others have given you, you can put those in the bag. Gifts from family and friends are generally gifts of love, even if it's just a card or a tiny piece of the card. Gifts of love are thought to hold the energy of love for the recipient of the gift. So if you are feeling down or in need of love or just want to be reminded of the fullness of the love that already exists in your life put those special gifts from loved ones in your bag. Today most people just wear them as jewelry, others sometimes put crystals in them. Personally I like to fill mine with prayers of love, and peace. |
|
||
home | contact us | payment, shipping, and refund policies © Copyright by HB Publications all rights reserved Website created & hosted by: Synergosspam protect Updated on Thursday, June 20th, 2013 |